On the eve of the New Year to her beloved daughter, every mother thinks about buying a holiday costume. Children want to be princesses, snowflakes, fairies and, of course, Snow Maidens.
The attire of the Snow Maiden can be sewn at home. In fact, not everything is as complicated as it seems for the first time. Today's master class is dedicated to creating a gorgeous Snow Maiden costume for a girl with her own hands.
Snow Maiden costume with a do-it-yourself skirt for a girl
The pattern while sewing this costume will not come in handy. The technique is simple and straightforward. A sun-shaped skirt looks great on a little girl. It is recommended not to sew it to the floor: it will be difficult for the child to play dynamic games during the holiday and wear the full weight of the costume for a long time.
Materials and tools: fabric, faux fur, sequins, pearls, scissors, tailor’s meter, chalk with a rope and pencil, sewing machine, needle and thread in tone.

Stage 1
The fabric is laid out on the desktop. A pencil is placed in the center. A rope is attached to it, to the end of which a tailor's chalk is attached. In this position of the tools, you can draw a perfect circle.
Stage 2
First, a small circle is drawn, equal to the circumference of the chest or waist. This figure depends on the age of the child: the older the girl, the lower the waist.
The next step is a large circle. To do this, depart from the small circle as much as the length of the skirt is assumed. It is from this new point that a large circle is drawn. Cut out a detail of a skirt in the shape of a sun.

Stage 3
The round coquette is cut in an already familiar technique. The smaller circumference is equal to the circumference of the neck plus 5 to 10 cm for a loose fit. The length of the indent is equal to the width of the shoulder plus 3 - 5 cm. A cut is made in front, as in the picture above.
Stage 4
The side seams on the skirt are sewn together. The top of the dress is made of fabric. Knowing the girth of the chest, the distance from the shoulder to the waist, the width of the shoulder and the girth of the neck, you can draw a hand-drawn pattern directly on the fabric with chalk. Everything is simple. Side seams are treated so that the fabric does not crumble.
Stage 5
The hem is recommended to be made not even, but curly. This makes the style interesting and memorable. A narrow strip of fur is sewn to the bottom edge.
Stage 6
The coquette is also decorated with fur. An additional decor made of pearls and sparkles will look beautiful.
Do-it-yourself Snow Maiden costume for a girl
This option of a soft fur coat is mastery in the shortest possible time without additional fitting. Most of the effort will need to be made to decorate with embroidery or ribbons with pearls. The costume differs from all styles by the least weight, which can play a major role in choosing a model.
Materials and tools: fabric, white fur, ribbon for decoration, scissors, dressmaker meter, chalk, sewing machine, needle and thread in tone, metal rivets.

Stage 1
The fabric for the suit is laid out along on the desktop.
Stage 2
In the middle, a circle is drawn for the neck. On the back side, the circle is smoothed out a bit, as in the picture above. An equal amount of length deviates from the neck, which is equal to the width of the shoulder. This rule works if a child's figure has a normal or thin physique. In a different situation, it is recommended to use a suit pattern with a skirt in the shape of the sun.
Stage 3
A line of product length is drawn from the visual strip of the mid-shoulder arrangement on both sides. It is recommended to choose a length below the knees. This is the perfect ratio of fit and silhouette.
Stage 4
A cut line is drawn on the chest to the very bottom.
Stage 5
The product is cut according to the drawn pattern. All side seams are processed.
Stage 6
The textile part of the sleeve is also made from a rectangle, where one side is equal to the girth of the arm (biceps) plus 5-10 cm, and the other to the desired length of the sleeve.
Stage 7
You can sew fur on your own around the edge of the costume for a girl, and sew pompons on your chest, as in the picture above.
Stage 8
Rivet buttons are sewn. It’s better not to sew them under the pompons: you can ruin the shape of the pompons, stain their snow-white color or tear them off. It is enough to deviate from them 2 - 3 cm.
Stage 9
Sew on sleeves. If desired, square textile gussets can be sewn under the armpits for a more free movement of the hand in a snow maiden's suit.
Stage 10
The costume is decorated with ribbons, sparkles and pearls.
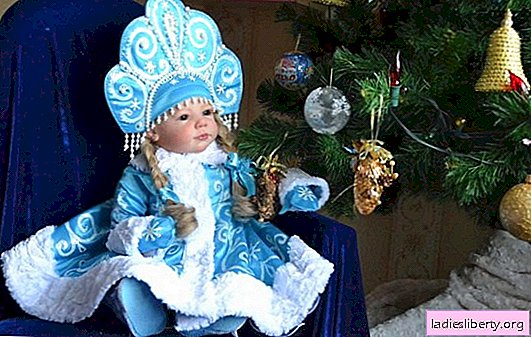
Do-it-yourself Snow Maiden costume from a tulle for a girl
The outfit consists of a cape, blouse, skirt and headdress - kokoshnik. Such a suit is not suitable for winter walks and walks on the street. However, in the hall, in the illumination of the paws, it looks charming, sparkles and attracts attention, which is what a little girl in such a suit wants.
Materials and tools: blue and white fabric (tulle, tulle), pelerine fabric (brocade and fur), satin for blue belt, elastic band 5 cm wide, scissors, tailor’s meter, sewing machine, needle and thread in tone.

Stage 1
A strip for the belt is cut from satin fabric. The width is equal to the width of the elastic, plus 2 cm for allowances on both sides and multiplied by two. The length is equal to the waist circumference plus 10 - 15 cm.
Stage 2
The strip for the belt is sewn along the length. The gum is inserted and both ends are sewn into one piece. Secret seams are applied, which are superimposed manually.
Stage 3
A strip of 2 meters long is cut from a blue tulle. The width is chosen according to your own desire based on the age and height of the girl. The cut strip is sewn to the belt from the wrong side.
Stage 4
A new strip is cut from the previous fabric 3 meters long. The width can be kept unchanged. A new piece of fabric is sewn to the previous sewn cut of tulle.
Stage 5
From white tulle, thinner strips 10 cm wide are cut. They are doubled in width and sewn along the lower edge of the previous row with the bent side. White tulle needs to be maximized, therefore it is difficult to calculate its consumption.
Stage 6
The lower skirt is made. The technique corresponds to steps 3.4 and 5, but the fabric for the lower row of blue in width (down) needs to be cut 2-4 cm more than the upper skirt. When all three rows of fabric are sewn, then the lower skirt is sewn under the upper skirt from the wrong side of the belt.
In the event that splendor is not enough, it is recommended to sew an additional lower skirt. Its dimensions are identical to the measurements of a lower skirt. No increase.
Stage 7
At this stage, a drape is sewn. It will be easier for beginners to make it from an old blouse. It is sheathed on the front side with fur, and on the wrong side - brocade. The height of the collar is 5 - 8 cm. It is recommended to insert several layers of brocade into the collar. This will allow you to straighten it in a rack or bend and keep the selected shape. However, for such a case, a piece of dense non-woven interlining or doubler will be suitable somewhere.
DIY Snow Maiden costume for the girl is ready!